<?xml version="1.0" encoding="utf-8"?>
<feed xmlns="http://www.w3.org/2005/Atom">
  <title>TechnicJelle's Blog</title>
  <subtitle>This is the Atom feed of TechnicJelle's blog. Here you will find articles I've written about things I've made, which can be games, art or something else entirely.</subtitle>
  <link href="https://technicjelle.com/blog/feed.xml" rel="self" />
  <link href="https://technicjelle.com/blog" rel="alternate" />
  <link href="https://technicjelle.com" rel="related" />
  <updated>2026-05-05T22:25:11.784Z</updated>
  <author>
    <name>TechnicJelle</name>
  </author>
  <id>urn:uuid:019dc1b3-1427-7fbf-b058-015b535012e1</id>
  <entry>
    <title>New Blog: Milestone 1</title>
    <link href="https://technicjelle.com/blog/2026/05/05/new-blog-milestone-1" rel="alternate" />
    <id>urn:uuid:019dfa0a-608e-78b6-a505-72db8b7f652a</id>
    <published>2026-05-05T00:00:00.000Z</published>
    <updated>2026-05-05T00:00:00.000Z</updated>
    <content type="xhtml" xml:lang="en" xml:base="https://technicjelle.com/blog/2026/05/05/new-blog-milestone-1">
      <div xmlns="http://www.w3.org/1999/xhtml">
        <nav class="center">
          <p>
            <a href="/blog/2026/04/18/new-blog-site">← Previous Post</a>
          </p>
        </nav>
        <p>Today, I have completed what I call "milestone 1" of my new blog!</p>
        <p>I have the basic infrastructure for my blog done, and I have ported over every post from my old blog.</p>
        <p>
          I will now do a "soft-launch"; push my blog to my actual website, but not link to it from the home page yet.
          <br />
          It needs more testing that can only happen from a proper https website.
          <br />
          (Especially the Atom feed...)
        </p>
        <p>Once I've resolved all the major bugs that I have no doubt I'll find, my next milestone will be to add tagging functionality.</p>
        <p>
          The third milestone will be syntax highlighting for code blocks.
          <br />
          I've done some research already, and I think I'll use tree-sitter for this.
          <br />
          But more research and experimentation will need to be done. Later, though.
        </p>
        <nav class="center">
          <p>
            <a href="/blog/2026/04/18/new-blog-site">← Previous Post</a>
          </p>
        </nav>
      </div>
    </content>
  </entry>
  <entry>
    <title>Finally started work on my blog site!</title>
    <link href="https://technicjelle.com/blog/2026/04/18/new-blog-site" rel="alternate" />
    <id>urn:uuid:019dc1ff-801e-757d-8c69-1ef41d0b25a3</id>
    <published>2026-04-18T00:00:00.000Z</published>
    <updated>2026-04-18T00:00:00.000Z</updated>
    <content type="xhtml" xml:lang="en" xml:base="https://technicjelle.com/blog/2026/04/18/new-blog-site">
      <div xmlns="http://www.w3.org/1999/xhtml">
        <nav class="center">
          <p>
            <a href="/blog/2026/05/05/new-blog-milestone-1">Next Post →</a>
          </p>
        </nav>
        <p>For a few years now, I've had my blog on Tumblr, and my portfolio on my own TechnicJelle.com site.</p>
        <p>Today is the day that ends! I will be "in-housing" my blog from Tumblr to my own custom site.</p>
        <p>Today, I've been laying the groundworks for this, and I'm looking forward to seeing what you all think! :)</p>
        <nav class="center">
          <p>
            <a href="/blog/2026/05/05/new-blog-milestone-1">Next Post →</a>
          </p>
        </nav>
      </div>
    </content>
  </entry>
  <entry>
    <title>Infrastructure for Disaster Control, a.k.a. Automatic Builds</title>
    <link href="https://technicjelle.com/blog/2025/01/19/infrastructure-for-disaster-control-aka-automatic-builds" rel="alternate" />
    <id>urn:uuid:019dc1ff-801e-7b3f-a8df-9692e3317030</id>
    <published>2025-01-19T00:00:00.000Z</published>
    <updated>2025-01-19T00:00:00.000Z</updated>
    <content type="xhtml" xml:lang="en" xml:base="https://technicjelle.com/blog/2025/01/19/infrastructure-for-disaster-control-aka-automatic-builds">
      <div xmlns="http://www.w3.org/1999/xhtml">
        <nav class="center">
          <p>
            <a href="/blog/2025/01/18/infrastructure-for-teamwork-aka-version-control">← Previous Post</a>
          </p>
        </nav>
        <p>We all know the feeling of pure and utter stress when, ten minutes before the deadline, you finally click the "Build And Export" button in your game engine, and then it fails to build for some reason.</p>
        <p>To prevent issues like this, people invented automated builds, also referred to as CI/CD (which stands for Continuous Integration and Continuous Deployment).</p>
        <p>
          This is a mechanism that tests the project every single time a change is made (a git commit is pushed, or a Perforce changelist is submitted).
          <br />
          Because of this, we very quickly know whenever a change broke the build, which means we can fix it immediately, instead of having to fix it at the end.
        </p>
        <p>
          It is also useful whenever a regression happens that doesn't break the build.
          <br />
          We can go back to a previous build, and see if the issue is there or not.
          <br />
          By checking a few builds by way of
          <a href="https://help.winternode.com/General-Utilities/Linear-Binary-Search">binary search</a>
          , we can very quickly pinpoint the exact change that caused the regression.
          <br />
          We have used this a few times, in fact.
          <br />
          Once, the weaving machines stopped showing up in the build, and with this method, we were able to pinpoint the exact change that caused it, and then we submitted a fix!
        </p>
        <p>It's very useful to have an archive of builds for every change we made to the project.</p>
        <p>
          There are multiple different softwares that do this kind of thing, but Jenkins is by and far the most used. Both by indies, but also large AAA studios!
          <br />
          So knowing how it works is very useful, so that's why I picked Jenkins for the job.
          <br />
          Again, like with Perforce, it was pretty easy to install!
        </p>
        <p>
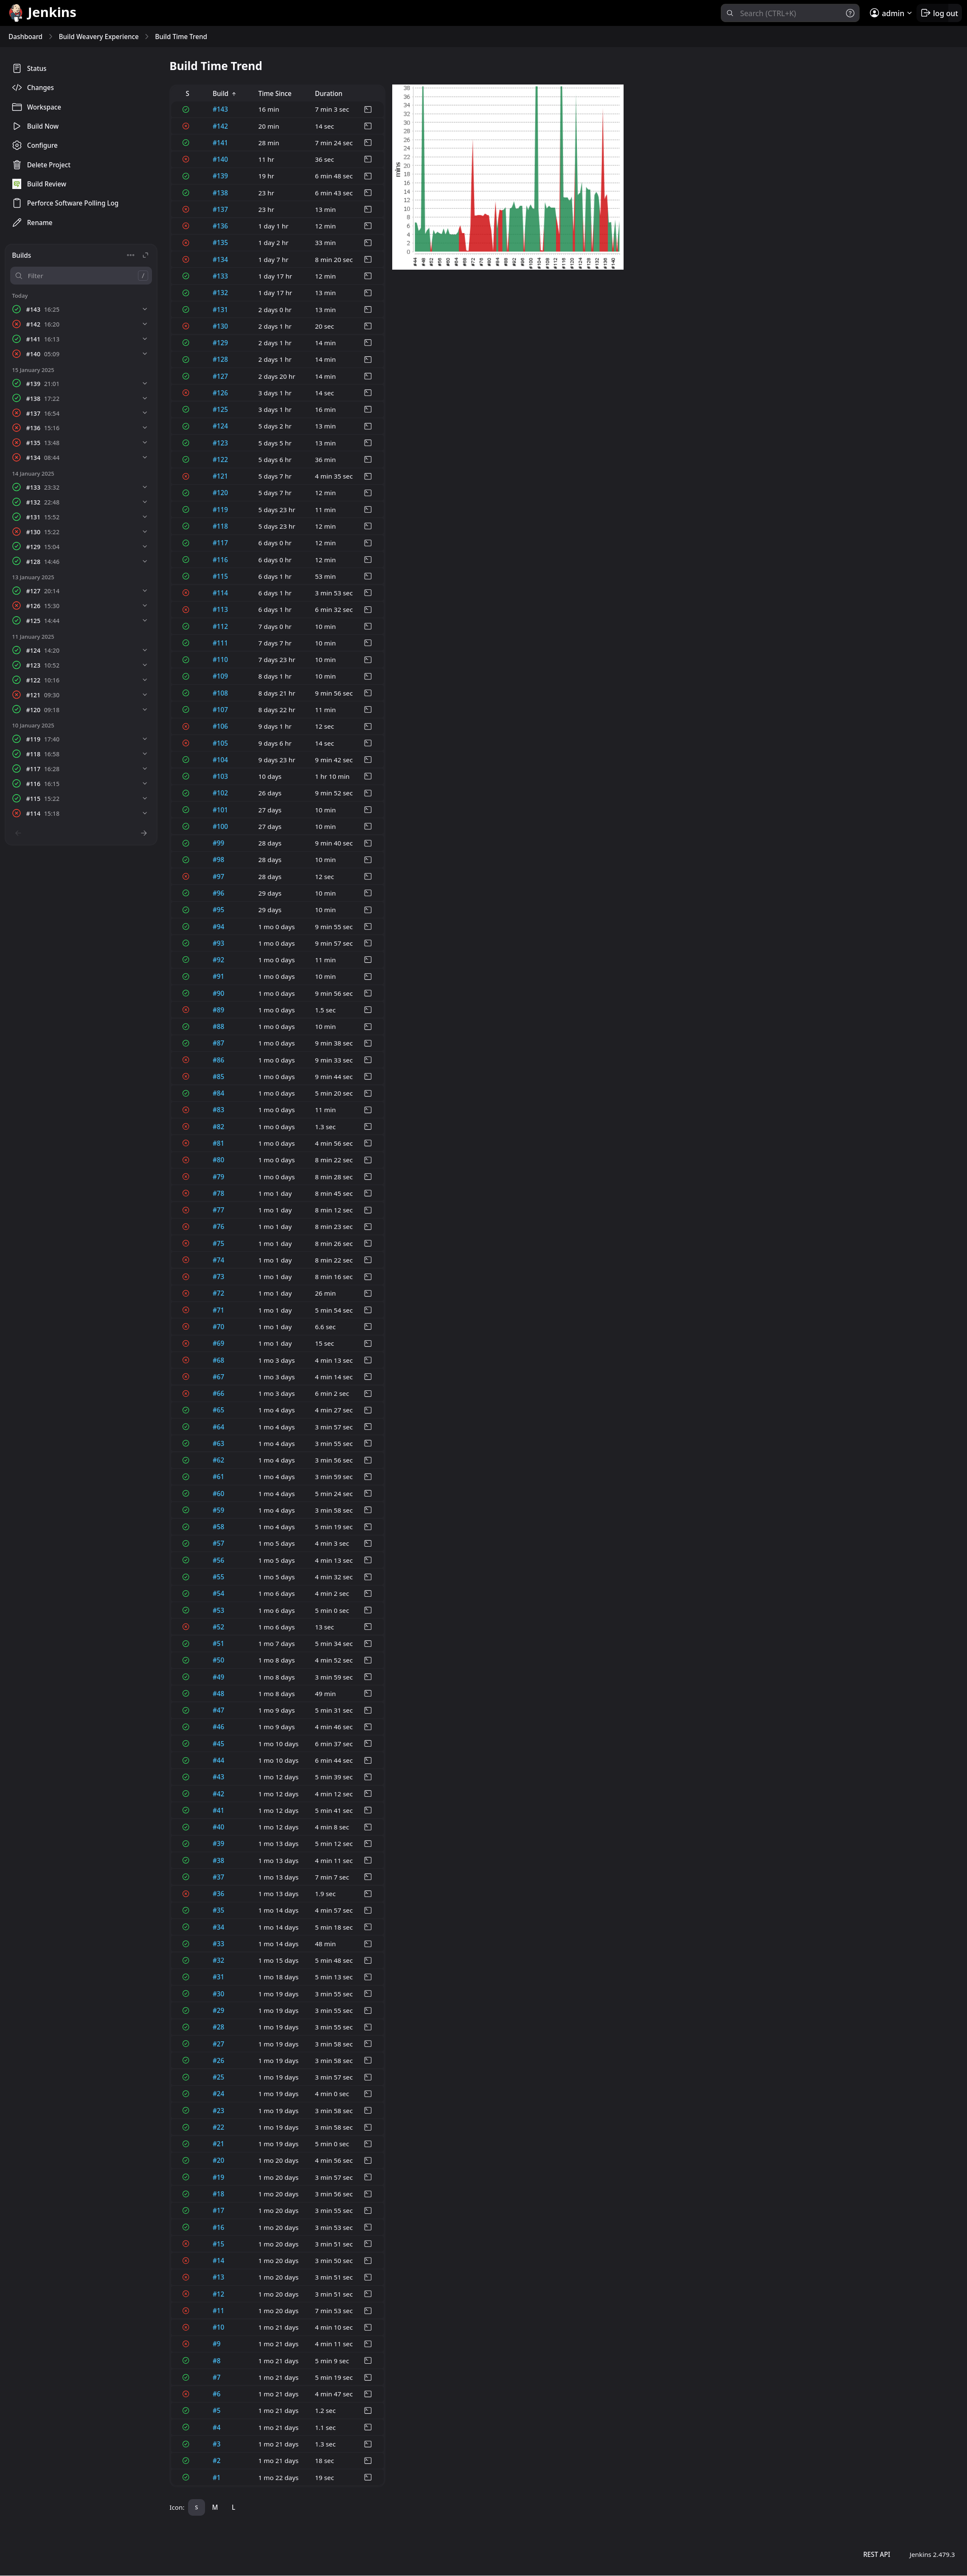
Here is a list of every build run that Jenkins did, including a neat little graph :)</p>
        <p>
          <img src="https://technicjelle.com/blog/2025/01/19/infrastructure-for-disaster-control-aka-automatic-builds/Screenshot_2025-01-16_at_16-42-45_Build_Weavery_Experience_Build_time_trend_Jenkins.png" alt="jenkins builds" />
        </p>
        <p>
          Configuring it was quite tricky, though.
          <br />
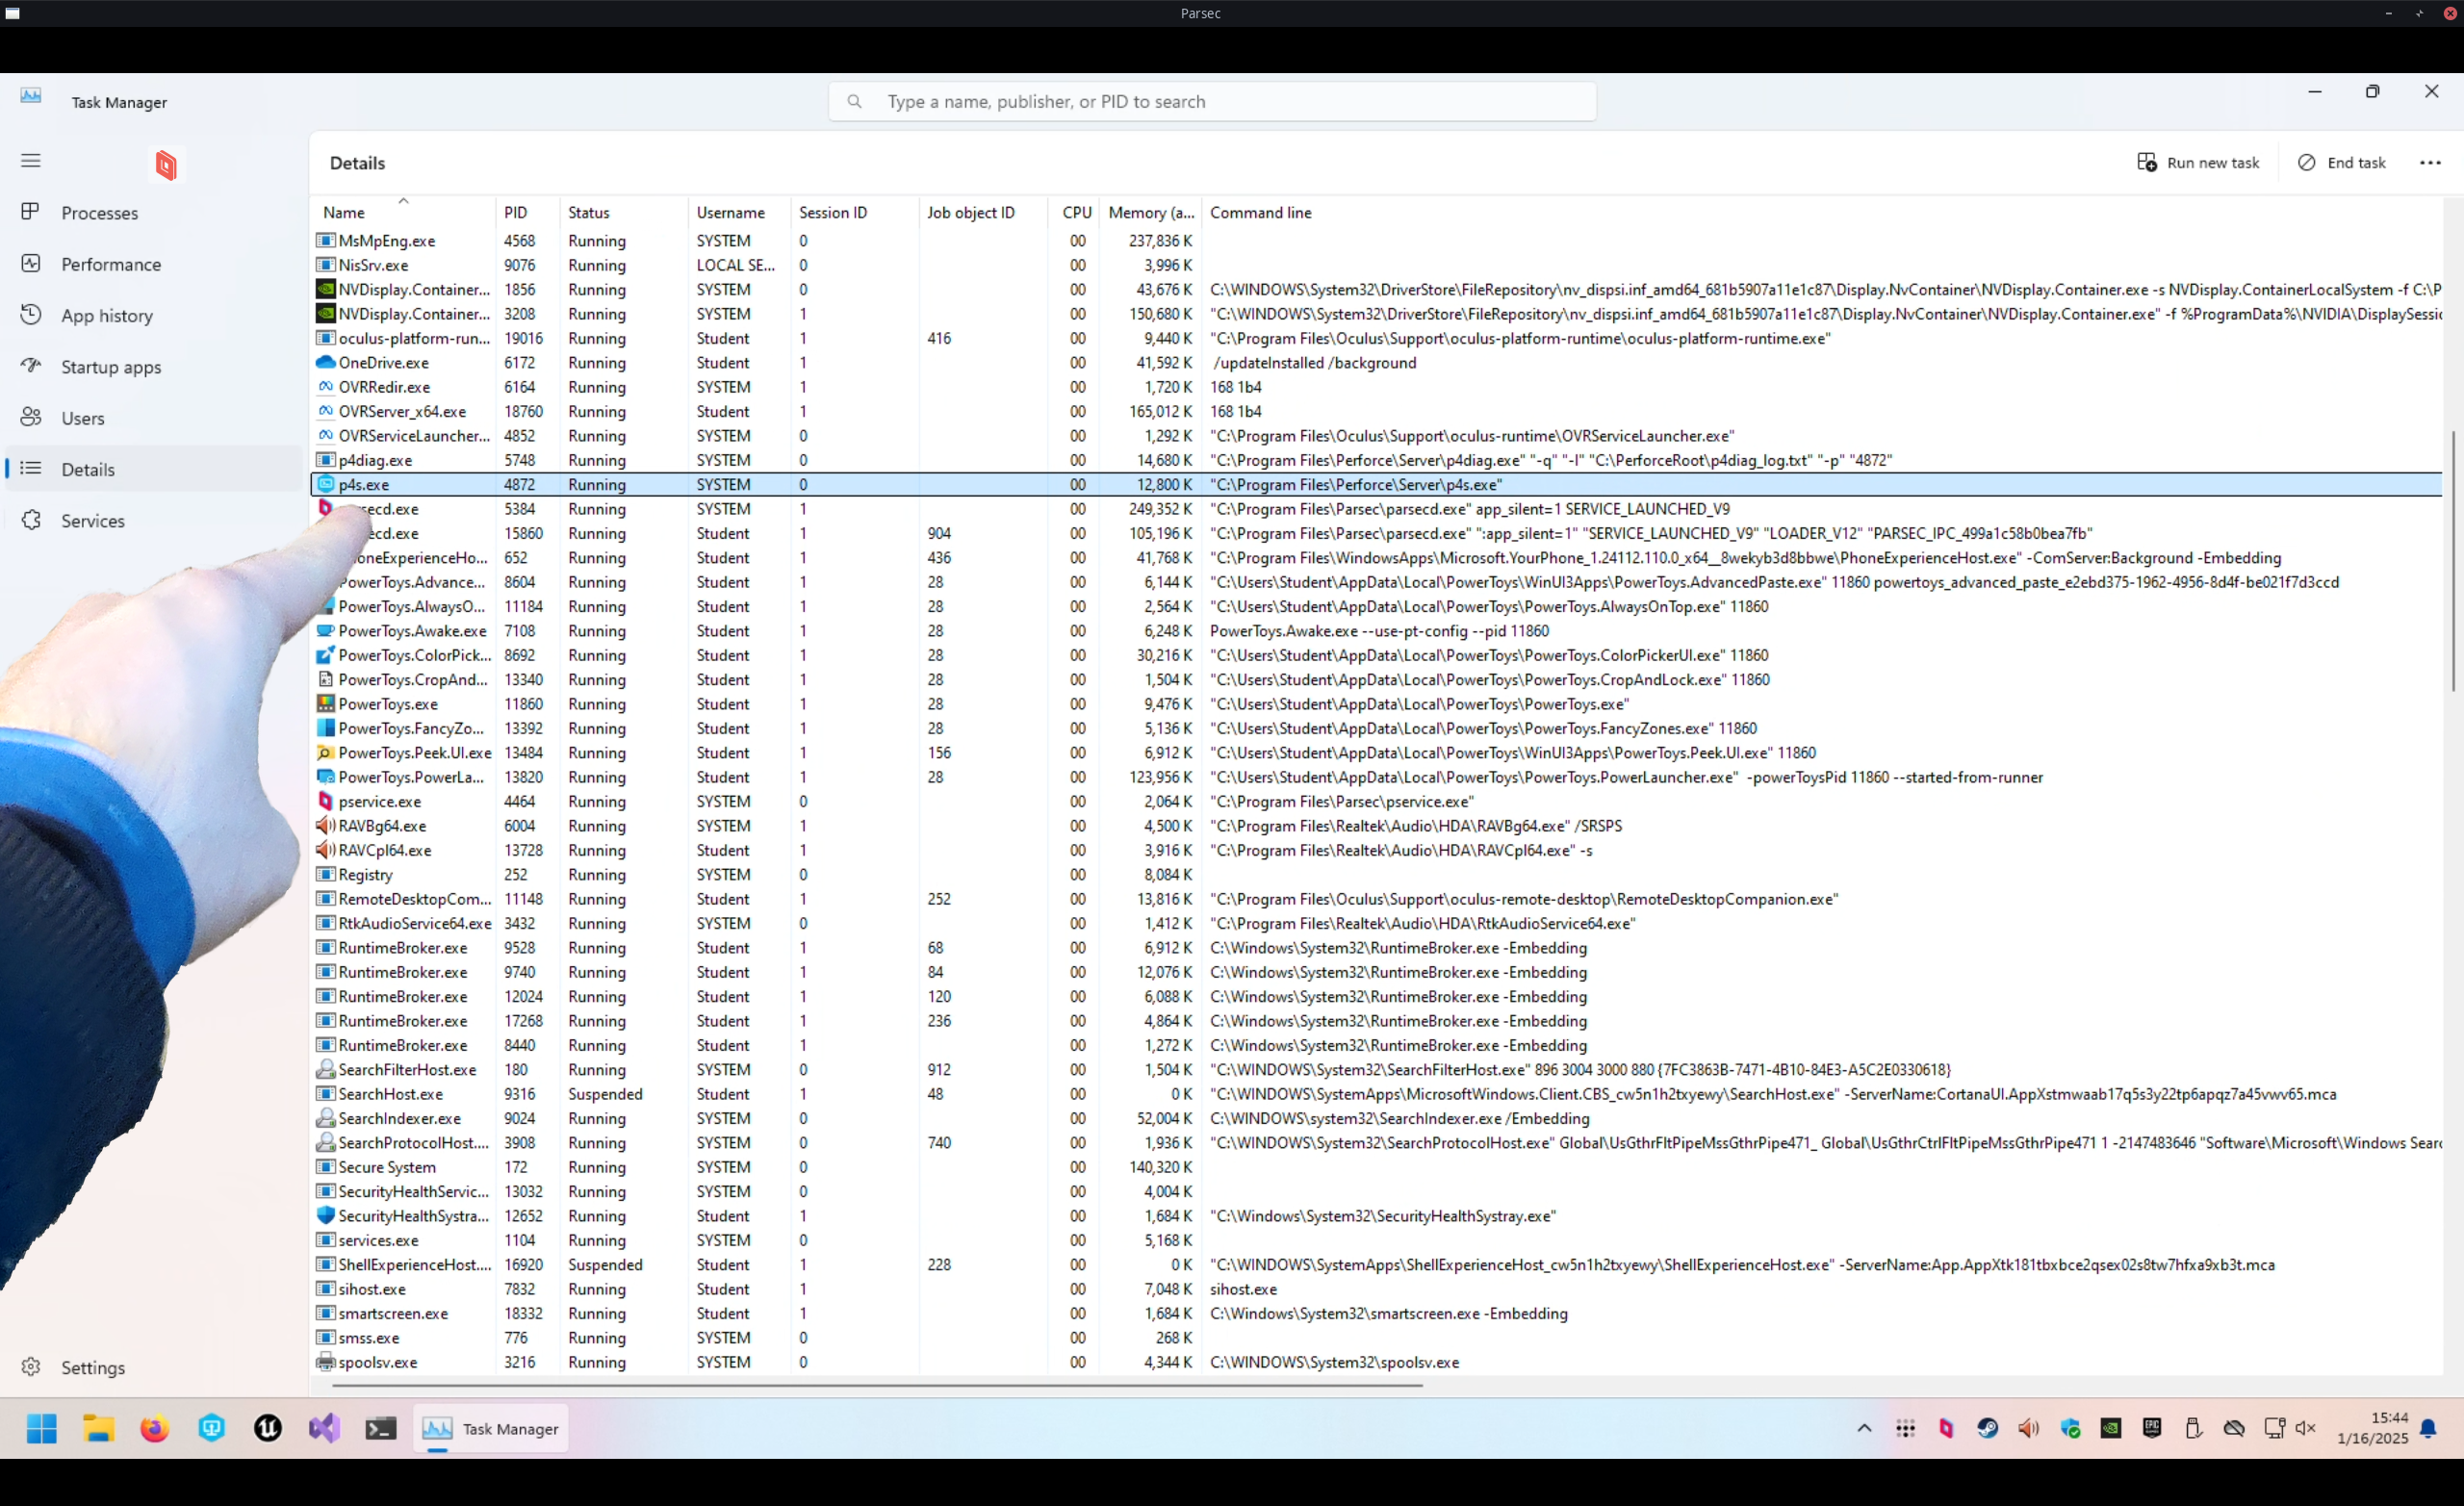
          I had to create a console terminal CLI command that makes Unreal Engine build project.
          <br />
          <span class="small">
            Resources used: (
            <a href="https://dev.epicgames.com/documentation/en-us/unreal-engine/unreal-automation-tool-overview-for-unreal-engine?application_version=5.4">one</a>
            ) (
            <a href="https://github.com/botman99/ue4-unreal-automation-tool">two</a>
            )
          </span>
        </p>
        <p>It took many days of constant iteration, but in the end, I got it to work very well!</p>
        <p>I also wrote some explanations of what Jenkins is and how to use it on the Jenkins pages themselves, for my teammates to read:</p>
        <h2 id="dashboard-the-home-page">
          Dashboard (The Home Page):
          <a href="#dashboard-the-home-page" class="link">🔗</a>
        </h2>
        <p>
          <img src="https://technicjelle.com/blog/2025/01/19/infrastructure-for-disaster-control-aka-automatic-builds/jenkins_dashboard.png" alt="dashboard" />
        </p>
        <h2 id="project-page">
          Project Page:
          <a href="#project-page" class="link">🔗</a>
        </h2>
        <p>
          <img src="https://technicjelle.com/blog/2025/01/19/infrastructure-for-disaster-control-aka-automatic-builds/jenkins_bwe.png" alt="project" />
        </p>
        <h2 id="notifications">
          Notifications
          <a href="#notifications" class="link">🔗</a>
        </h2>
        <p>
          Now, it is of course very useful to build the project and catch errors when they happen, but if no-one looks on the Jenkins page, then no-one will see the status!
          <br />
          Even if the website is accessible to everyone, people won't really look there very often.
          <br />
          Which kind of makes the whole thing useless...
          <br />
          So to solve that issue, I implemented Discord pings!
          <br />
          There is
          <a href="https://plugins.jenkins.io/discord-notifier/">a Jenkins plugin</a>
          that automatically sends messages to a specific Discord channel once the build is done.
          <br />
          This lets everyone know when the build succeeded or failed.
        </p>
        <p>
          <img src="https://technicjelle.com/blog/2025/01/19/infrastructure-for-disaster-control-aka-automatic-builds/Screenshot_2025-01-17_22-56-22.png" alt="discord" />
        </p>
        <p>
          We of course already had a discord server that we used to discuss everything in, and to hold our online meetings with.
          <br />
          So this #build-status channel fit in perfectly, and it was super helpful in catching and solving issues.
        </p>
        <p>
          Whenever a build failed, people could click on the link, and see the console output that Unreal Engine gave during the build, so we could instantly see where the issue was coming from.
          <br />
          And because it rebuilds for every change that is made, we know for certain that the issue can only have come from the change that was just made!
          <br />
          This meant that keeping every change small, made it easier to find and fix problems!
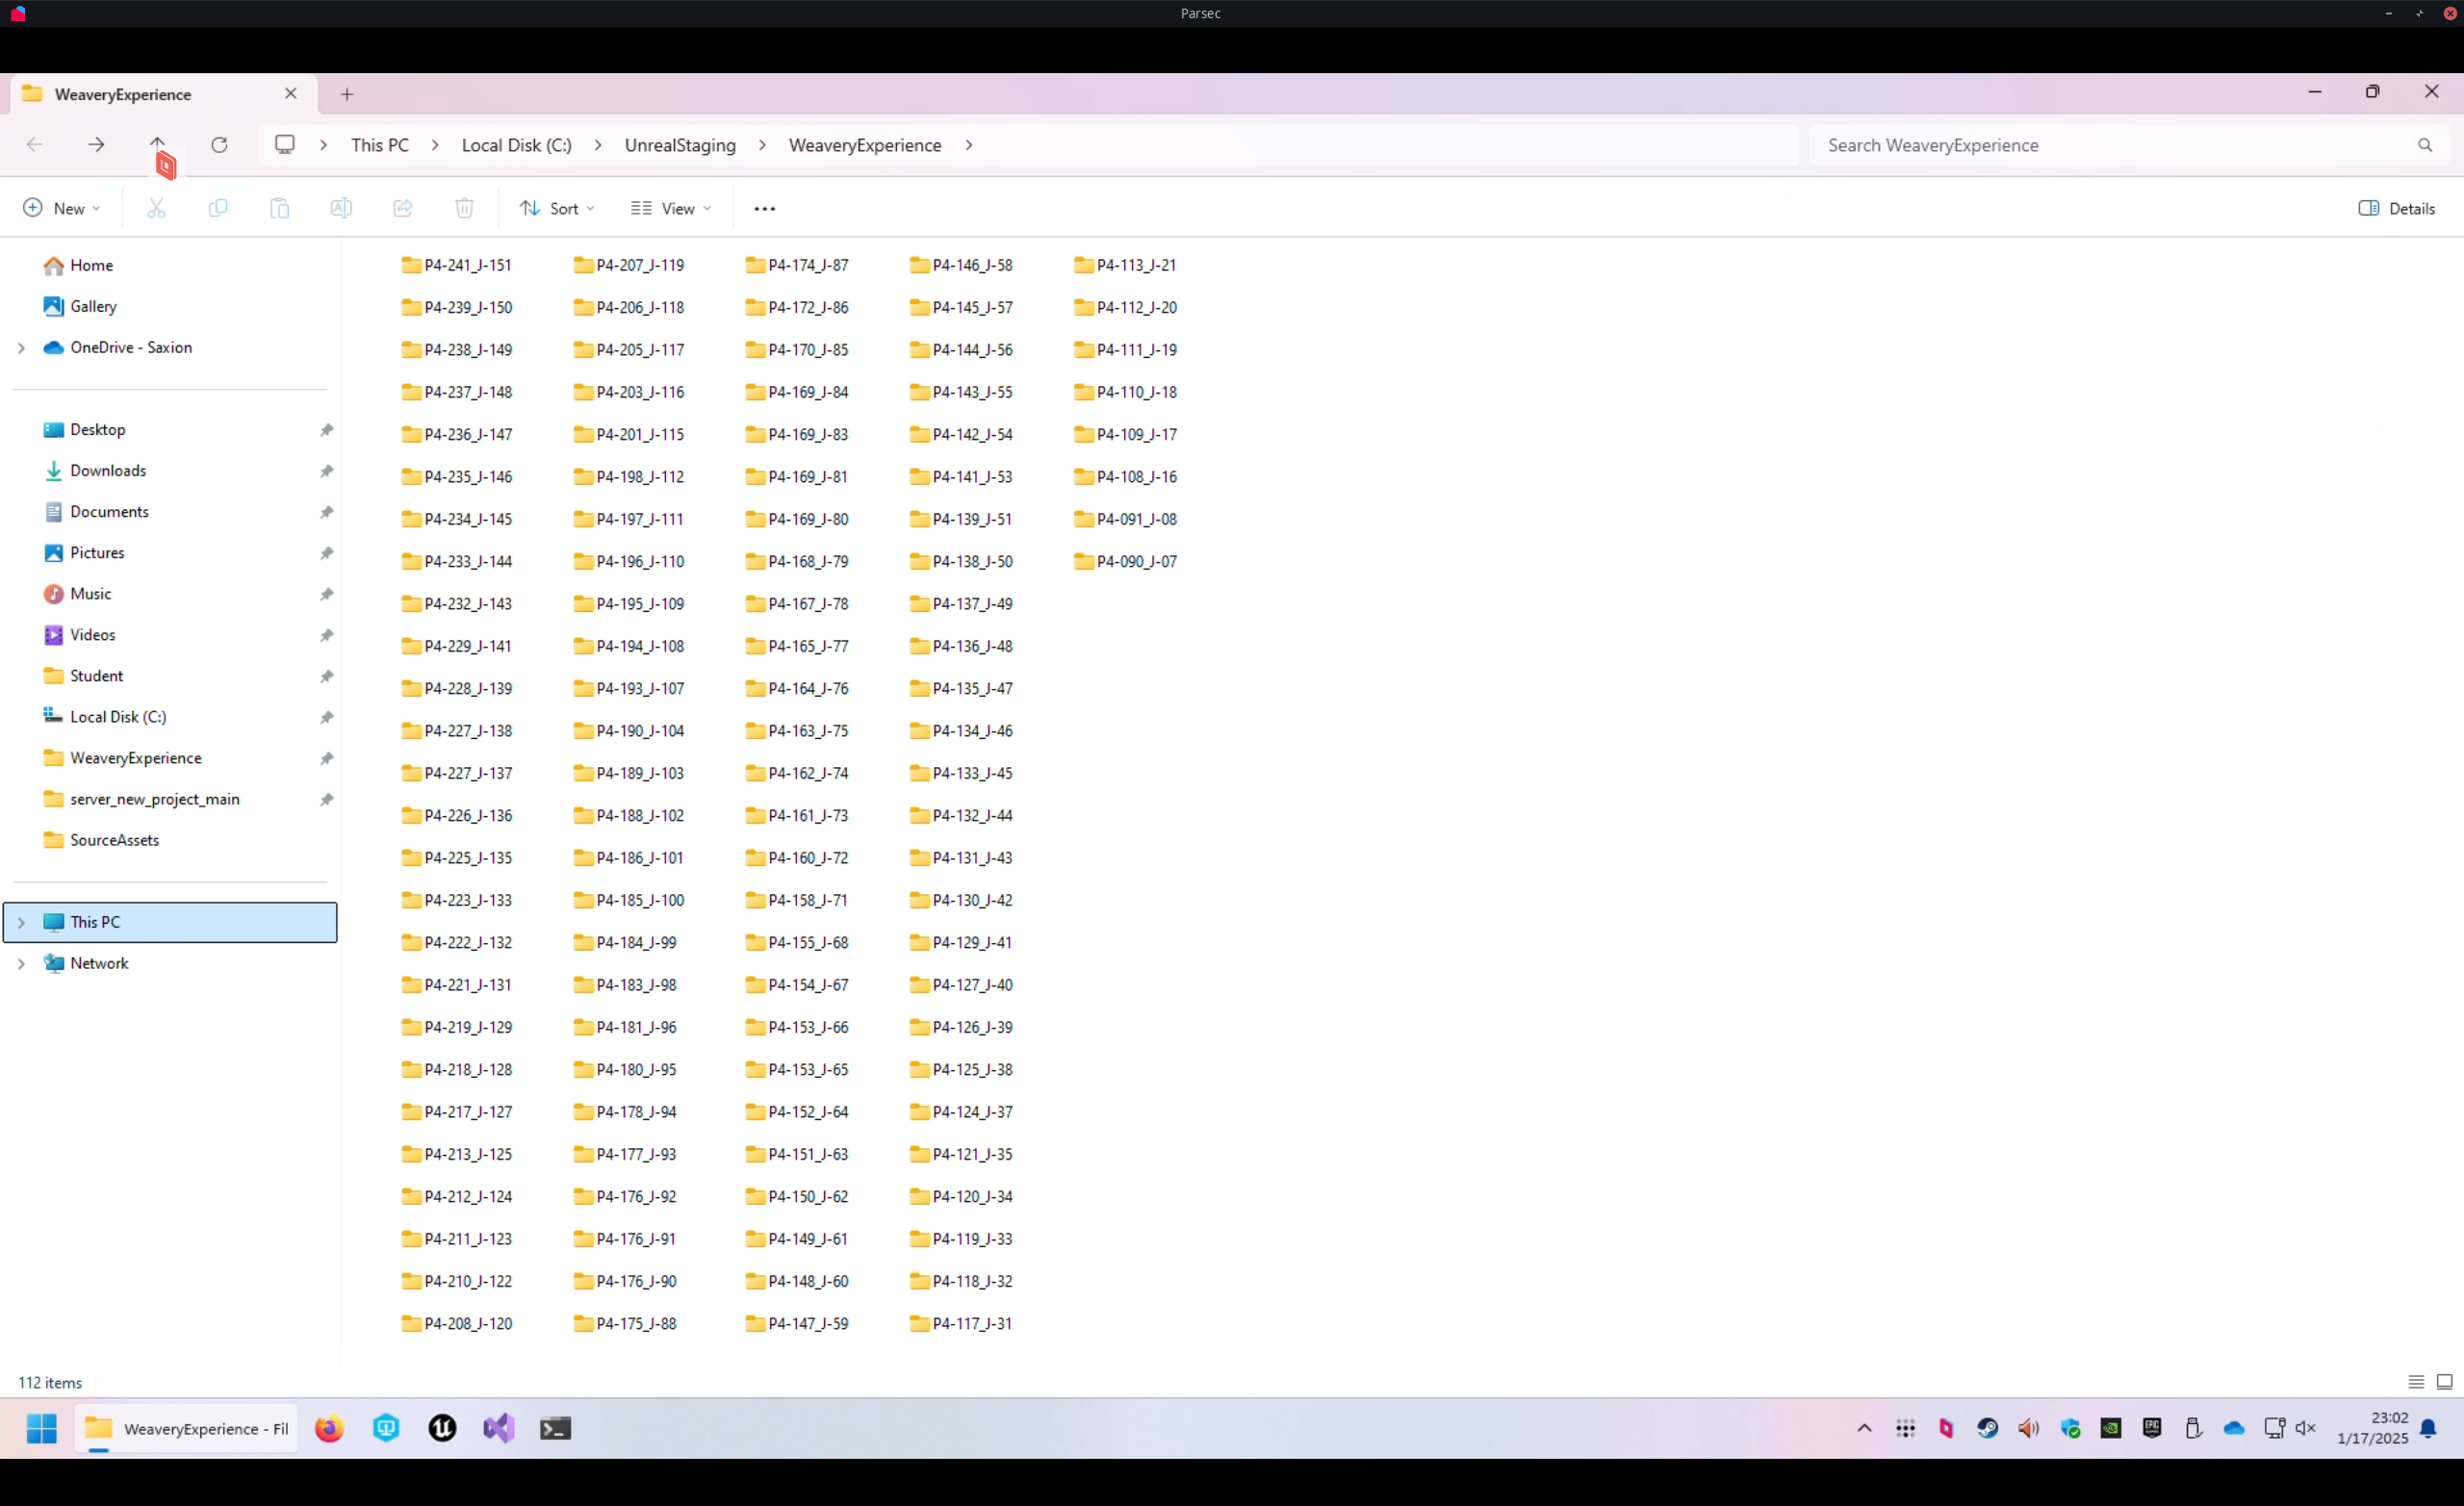
        </p>
        <h2 id="archive">
          Archive
          <a href="#archive" class="link">🔗</a>
        </h2>
        <p>Whenever a build succeeds, it gets stored on the server, in the build archive.</p>
        <p>
          <img src="https://technicjelle.com/blog/2025/01/19/infrastructure-for-disaster-control-aka-automatic-builds/Screenshot_2025-01-17_23-02-45.png" alt="archive" />
        </p>
        <p>
          But storing it on the server alone is nice and all, but people can't really do anything with them there.
          <br />
          I could personally access them by remotely connecting to the server, but I cannot make my teammates go through all that.
          <br />
          So I needed to make them more accessible for the whole team, to download whenever they please.
        </p>
        <p>
          For this, I wanted to create a small website, from which they can download them.
          <br />
          Just by going to the link, they could scroll through every build and download it immediately.
        </p>
        <p>I already knew of multiple ways of easily doing this, so I tried out a few.</p>
        <p>
          The Python programming language actually ships with a built-in webserver module that can be used very easily with a single command.
          <br />
          But Python wasn't installed, and installing Python on Windows is kind of annoying, so I wanted something else. Something simpler.
        </p>
        <p>I often use the program "darkhttpd" whenever I want a simple webserver, so I tried to download that, but I couldn't get it to work on Windows. Seems like it only really supports Linux...</p>
        <p>
          So I went looking for other, single-executable, webserver programs that
          <em>do</em>
          support Windows.
        </p>
        <p>
          And so I stumbled on "caddy".
          <br />
          I'd actually heard of it before, but never used it, as I never had a need for it before then. For actual full websites, I've always used nginx.
          <br />
          After some time of looking at the official documentation of caddy's various configuration file formats and command-line arguments, and tweaking things, I had it working like I wanted!
          <br />
          It now even automatically starts when the computer boots up, which is something that Perforce and Jenkins set up automatically.
          <br />
          <span class="small">
            Resources used: (
            <a href="https://caddyserver.com/">one</a>
            ) (
            <a href="https://caddyserver.com/docs/quick-starts/static-files">two</a>
            ) (
            <a href="https://caddyserver.com/docs/caddyfile/directives/file_server">three</a>
            ) (
            <a href="https://caddyserver.com/docs/running#windows-service">four</a>
            )
          </span>
        </p>
        <p>
          <img src="https://technicjelle.com/blog/2025/01/19/infrastructure-for-disaster-control-aka-automatic-builds/caddy.png" alt="list of files" />
        </p>
        <h2 id="network-map">
          Network map
          <a href="#network-map" class="link">🔗</a>
        </h2>
        <p>Here's a summary of the setup, drawn as a network map:</p>
        <p>
          <img src="https://technicjelle.com/blog/2025/01/19/infrastructure-for-disaster-control-aka-automatic-builds/NetworkMap.excalidraw.png" alt="network map" />
        </p>
        <h2 id="future">
          Future
          <a href="#future" class="link">🔗</a>
        </h2>
        <p>
          There is a concept called
          <a href="https://en.wikipedia.org/wiki/Infrastructure_as_code">IAC, Infrastructure As Code</a>
          , which I would like to look into, in the future.
          <br />
          It seems very useful for these kinds of situations where other people have to be able to take over and reproduce the setups.
        </p>
        <h2 id="inheritance">
          Inheritance
          <a href="#inheritance" class="link">🔗</a>
        </h2>
        <p>And I think that's it! Unfortunately, likely none of this will roll over to the next team that has to work on this project, because none of this is code that is inside our project folder. I requested that they inherit the server computer, but I'm not confident that they will accept it.</p>
        <nav class="center">
          <p>
            <a href="/blog/2025/01/18/infrastructure-for-teamwork-aka-version-control">← Previous Post</a>
          </p>
        </nav>
      </div>
    </content>
  </entry>
  <entry>
    <title>Infrastructure for Teamwork, a.k.a. Version Control</title>
    <link href="https://technicjelle.com/blog/2025/01/18/infrastructure-for-teamwork-aka-version-control" rel="alternate" />
    <id>urn:uuid:019dc1ff-801e-713c-b344-19289f5adb28</id>
    <published>2025-01-18T00:00:00.000Z</published>
    <updated>2025-01-18T00:00:00.000Z</updated>
    <content type="xhtml" xml:lang="en" xml:base="https://technicjelle.com/blog/2025/01/18/infrastructure-for-teamwork-aka-version-control">
      <div xmlns="http://www.w3.org/1999/xhtml">
        <nav class="center">
          <p>
            <a href="/blog/2025/01/19/infrastructure-for-disaster-control-aka-automatic-builds">Next Post →</a>
          </p>
        </nav>
        <p>
          Working together on a game is quite difficult.
          <br />
          How do you make sure everyone is on the same page?
        </p>
        <p>
          You could send zips with assets and code between people, but that is slow, cumbersome, and
          <em>very</em>
          error-prone.
        </p>
        <p>
          This is why Source Control software was invented.
          <br />
          With Source Control, you can store the project files on a server, and everyone who wants to work on the project files, can download the project from the server.
          <br />
          Once they're done with their changes, they send them back to the server.
          <br />
          Then the other people can get those changes from the server again.
        </p>
        <p>
          There are many different Source Control softwares. Probably the best-known one is git.
          <br />
          (Source Control, Version Control, Revision Control all mean essentially the same thing.)
        </p>
        <p>
          Git is very good for working on projects that are all just plain-text code.
          <br />
          However, it kind of falls flat when it needs to deal with binary assets, like textures, models, and sounds.
          <br />
          There are solutions to this, like git-lfs and git-annex, but those are still not very nice to use.
          <br />
          git-lfs is quite expensive if you use GitHub, and it's not very simple to self-host either.
          <br />
          git-annex is much easier to self-host, but it's not as well-supported as git-lfs.
        </p>
        <p>
          In Unreal Engine, Scenes and Blueprints are also binary files.
          <br />
          So if you don't use C++ but only Blueprints, basically your entire project is binary files.
        </p>
        <p>
          This is why I went looking for a different Version Control Software that can handle this better.
          <br />
          At my internship, I used Subversion, which is said to work better with binary assets, but in my experience then, it still wasn't exactly great.
          <br />
          Though that might also have been due to the fact that they barely used any of its fancier features there.
        </p>
        <p>
          Unreal Engine itself recommends using Perforce Helix Core.
          <br />
          (Perforce is the company, Helix Core is the VCS, but the term "Perforce" is usually used to refer to the VCS itself, due to historical reasons.
          <a href="https://www.youtube.com/watch?v=jIQEjDiSe0g">Source</a>
          )
          <br />
          So I looked into it, and indeed, it seemed very suitable!
        </p>
        <p>We requested a computer from the XR Lab to use as server for this project, and I installed the Helix Core Server on it.</p>
        <p>
          <img src="https://technicjelle.com/blog/2025/01/18/infrastructure-for-teamwork-aka-version-control/IMG_20241106_150432066.jpg" alt="I point to the server computer" />
        </p>
        <p>
          <img src="https://technicjelle.com/blog/2025/01/18/infrastructure-for-teamwork-aka-version-control/Screenshot_2025-01-16_15-44-32-v3.png" alt="I point to the p4s.exe in Task Manager" />
        </p>
        <p>It was surprisingly easy to install!</p>
        <p>
          I then downloaded the Helix Core Client application on my laptop, and connected to the server.
          <br />
          The setup there took a while, because there was a lot to learn.
          <br />
          But in the end, I did it!
        </p>
        <p>
          Sadly, Perforce is not free, so we are forced to use the free version, which is limited to a maximum of five users.
          <br />
          We are with ten people, so we had to choose a few "representatives" who would actually put the things everyone made into the project.
        </p>
        <p>
          We requested an educational licence from Saxion, but got told to wait. Now that the project is over, we still don't have it...
          <br />
          We also requested an educational licence from Perforce itself, directly, but we have still not got a response either.
          <br />
          But we made do with the limitations we got.
        </p>
        <p>
          I wrote
          <a href="https://github.com/TechnicJelle/UE5_GHActions_VRTemplate/blob/main/docs/Perforce%20Setup%20Guide%20for%20Users/README.md">a guide</a>
          for my teammates on how to set up a workspace for the project with Perforce, and improved it multiple times based on user testing and feedback.
          <br />
          (I sat next to my teammates while they were following the guide and tried my best to not say anything; to let the guide speak for itself. I would then take note of what went wrong and improved that section of the guide for the next user test.)
        </p>
        <p>
          Over the months of this project, we all used P4V and Perforce to work together on the project.
          <br />
          Due to Perforce's locking system, we never had any merge conflicts!
          <br />
          Most of the team actually really enjoyed working with Perforce.
          <br />
          Personally, I do miss git, but I acknowledge that for an Unreal Engine project, Perforce is a lot better.
        </p>
        <p>
          And I also found it pretty nice to work with.
          <br />
          The documentation was pretty good, and they have a lot of tutorials, guide, and demonstration videos, which have been very helpful during the setup.
          <br />
          It's very useful to be able to follow along every single click.
        </p>
        <nav class="center">
          <p>
            <a href="/blog/2025/01/19/infrastructure-for-disaster-control-aka-automatic-builds">Next Post →</a>
          </p>
        </nav>
      </div>
    </content>
  </entry>
  <entry>
    <title>A few screenshots from the Weaving Factory project</title>
    <link href="https://technicjelle.com/blog/2024/12/17/weaving-factory-screenshots" rel="alternate" />
    <id>urn:uuid:019dc1ff-801e-7675-b43c-a8302dd585b2</id>
    <published>2024-12-17T00:00:00.000Z</published>
    <updated>2024-12-17T00:00:00.000Z</updated>
    <content type="xhtml" xml:lang="en" xml:base="https://technicjelle.com/blog/2024/12/17/weaving-factory-screenshots">
      <div xmlns="http://www.w3.org/1999/xhtml">
        <p>These are a few excerpts from a recording of the first time I managed to get the experience running on the standalone VR headset.</p>
        <p>
          <img src="https://technicjelle.com/blog/2024/12/17/weaving-factory-screenshots/1.png" alt="one" />
        </p>
        <p>
          <img src="https://technicjelle.com/blog/2024/12/17/weaving-factory-screenshots/2.png" alt="two" />
        </p>
        <p>
          <em>
            (This was captured by
            <a href="https://github.com/Genymobile/scrcpy">scrcpy</a>
            'ing from the headset to the remote development machine. From there, the screen was cast to my own laptop through
            <a href="https://parsec.app/">Parsec</a>
            , where it was finally recorded with
            <a href="https://github.com/phw/peek">Peek</a>
            . Still one of the wildest tech-stacks I've ever used, haha)
          </em>
        </p>
      </div>
    </content>
  </entry>
  <entry>
    <title>Controller-less VR teleportation</title>
    <link href="https://technicjelle.com/blog/2024/11/08/controller-less-vr-teleportation" rel="alternate" />
    <id>urn:uuid:019dc1ff-801e-795c-8190-b73dba486e4f</id>
    <published>2024-11-08T00:00:00.000Z</published>
    <updated>2024-11-08T00:00:00.000Z</updated>
    <content type="xhtml" xml:lang="en" xml:base="https://technicjelle.com/blog/2024/11/08/controller-less-vr-teleportation">
      <div xmlns="http://www.w3.org/1999/xhtml">
        <p>For my study, I am currently working with a team of other students on a VR experience for a local museum.</p>
        <p>The museum plans to have a VR headset somewhere, which visitors can put on to experience how life was like in the past.</p>
        <p>There are lots of things to show, so the user needs some way to move from one place to another.</p>
        <p>Sometimes, this is done with a Controller, where the user can move the joystick, which moves the camera around the virtual world.</p>
        <p>
          <img src="https://technicjelle.com/blog/2024/11/08/controller-less-vr-teleportation/controllers.png" alt="controllers" />
        </p>
        <p>This has a big problem, however: such smooth movement in VR is incredibly nauseating for people who are not accustomed to it, which is definitely most museum visitors.</p>
        <p>
          As such, game designers in the past invented the now common mechanic of
          <strong>teleportation</strong>
          . You point the controller somewhere, click a button, and you get teleported to where you were pointing.
          <br />
          The range is usually not very large, to keep it balanced.
          <br />
          I have also seen a slightly different mechanic in some VR games, where there isn't a
          <em>button</em>
          to teleport, but it is the
          <em>joystick</em>
          . You point the joystick somewhere, and you can choose which direction you want to end up in after the teleport.
        </p>
        <p>The concern is that this can be a bit tricky to learn how to do.</p>
        <p>
          Especially
          <strong>if we decide to not use any controllers</strong>
          . To keep things simpler, we would like to not need controllers. Putting on the headset is already complicated enough, and we need to keep this experience as accessible as possible.
          <br />
          Controllers can also get stolen or damaged.
        </p>
        <p>Luckily, there are ways to do this teleportation with hand gestures only!</p>
        <p>However, these gestures are even more complicated than the controller buttons for it.</p>
        <p>So we racked our brains over a really nice way to handle moving around the environment.</p>
        <p>Finally, I had an idea!</p>
        <p>
          We can designate specific
          <em>Points Of Interest</em>
          in the environment, which will be the only places the user can be at.
          <br />
          Then to move from one POI to the other, the user can just look over to such a POI, and they will teleport to it.
        </p>
        <p>Of course, that teleportation should not be instant, otherwise that will still be confusing and disorienting.</p>
        <p>
          So if the user looks at a POI, a small animation will play in front of them to show that something will happen shortly.
          <br />
          (If they look away again, the countdown and whole teleportation process will be cancelled, naturally. They really need to stare at the POI for a solid few seconds, to make sure they really want to do it.)
        </p>
        <p>
          After that animation finishes playing, the screen will fade to black and back. During the darkness, the user will have been teleported.
          <br />
          The teleportation is not instant, again, to prevent disorienting the user.
        </p>
        <p>
          I mocked up a small visual example of how this system could look like in Blender, and showed it to my team.
          <br />
          They unanimously agreed with the system! 🥳
        </p>
        <p>Here is that animation:</p>
        <p>
          <video src="https://technicjelle.com/blog/2024/11/08/controller-less-vr-teleportation/MovementConcept0001-0250.mp4" controls="" loop="" muted="" playsinline=""></video>
        </p>
        <p>You will see that the Points Of Interest are marked with blue holograms, which become taller if the user looks near them.</p>
        <p>We are not entirely sure if this part will remain this way, as the museum really wants the experience to be as purely realistic as possible.</p>
      </div>
    </content>
  </entry>
  <entry>
    <title>Planes Tower Defence - The Rest</title>
    <link href="https://technicjelle.com/blog/2023/01/28/planes-tower-defence-003-the-rest" rel="alternate" />
    <id>urn:uuid:019df518-b25f-79fd-8a07-11a427e969bf</id>
    <published>2023-01-28T00:00:00.000Z</published>
    <updated>2023-01-28T00:00:00.000Z</updated>
    <content type="xhtml" xml:lang="en" xml:base="https://technicjelle.com/blog/2023/01/28/planes-tower-defence-003-the-rest">
      <div xmlns="http://www.w3.org/1999/xhtml">
        <nav class="center">
          <p>
            <a href="/blog/2023/01/19/planes-tower-defence-002-pathfinding">← Previous Post</a>
          </p>
        </nav>
        <p>
          <em>(This post was written years later, because I found some more early footage)</em>
        </p>
        <h2 id="enemies">
          Enemies
          <a href="#enemies" class="link">🔗</a>
        </h2>
        <p>The following video was recorded right after I added an enemy object, which can follow the paths I described in the previous post.</p>
        <p>
          <video src="https://technicjelle.com/blog/2023/01/28/planes-tower-defence-003-the-rest/Peek 2023-01-02 01-08.mp4" controls="" muted="" playsinline=""></video>
        </p>
        <p>I then also added a secondary, faster but weaker enemy, which is red.</p>
        <h2 id="waves">
          Waves
          <a href="#waves" class="link">🔗</a>
        </h2>
        <p>The waves are defined through Unity ScriptableObjects. In the next video, you can see a countdown in the Console in the bottom left, and the ScriptableObjects in the Asset Browser in the bottom right.</p>
        <p>
          <video src="https://technicjelle.com/blog/2023/01/28/planes-tower-defence-003-the-rest/Peek 2023-01-11 20-51.mp4" controls="" muted="" playsinline=""></video>
        </p>
        <h2 id="ui-enemy-sprites">
          UI &amp; Enemy sprites
          <a href="#ui-enemy-sprites" class="link">🔗</a>
        </h2>
        <p>Enemies now are not just white/red squares anymore, but actual sprites. I chose the tanks for them.</p>
        <p>They now also have health and a health bar.</p>
        <p>I added UI in the top left corner that displays the current wave, and the countdown to the next wave.</p>
        <p>In the bottom right is the player's HP, which is not yet implemented in this video:</p>
        <p>
          <video src="https://technicjelle.com/blog/2023/01/28/planes-tower-defence-003-the-rest/Peek 2023-01-14 00-40.mp4" controls="" muted="" playsinline=""></video>
        </p>
        <h2 id="towers">
          Towers
          <a href="#towers" class="link">🔗</a>
        </h2>
        <p>It was finally time to actually add the towers!</p>
        <p>I added some pre-defined spots where they can be placed in the level. Players can click on one, and a pop-up menu will appear around there, showing the four available towers types.</p>
        <p>The towers point to the nearest enemy, spawn bullets that travel forwards and hit the enemies, doing damage.</p>
        <p>Towers only have a limited range and fire rate, which differs per tower type.</p>
        <p>In this video, I haven't implemented the currency yet, so I could place towers anywhere and as much as I wanted.</p>
        <p>
          <video src="https://technicjelle.com/blog/2023/01/28/planes-tower-defence-003-the-rest/Peek 2023-01-28 00-22.mp4" controls="" muted="" playsinline=""></video>
        </p>
        <h2 id="final-result">
          Final Result
          <a href="#final-result" class="link">🔗</a>
        </h2>
        <p>I don't have any more videos, but I implemented everything I set out to implement!</p>
        <p>There is one level with a few waves, two enemy types, four tower types, player HP and economy.</p>
        <p>(Balancing is probably not very good, but that wasn't the goal of this project anyway.)</p>
        <p>
          <strong>
            The game is freely playable
            <a href="https://technicjelle.com/PlanesTowerDefence/">here</a>
            , right in your browser!
          </strong>
        </p>
        <p>
          Source code available
          <a href="https://github.com/TechnicJelle/PlanesTowerDefence">here</a>
        </p>
        <nav class="center">
          <p>
            <a href="/blog/2023/01/19/planes-tower-defence-002-pathfinding">← Previous Post</a>
          </p>
        </nav>
      </div>
    </content>
  </entry>
  <entry>
    <title>Planes Tower Defence - "Pathfinding"</title>
    <link href="https://technicjelle.com/blog/2023/01/19/planes-tower-defence-002-pathfinding" rel="alternate" />
    <id>urn:uuid:019dc1ff-801e-735d-a3ab-ac4424599656</id>
    <published>2023-01-19T00:00:00.000Z</published>
    <updated>2023-01-19T00:00:00.000Z</updated>
    <content type="xhtml" xml:lang="en" xml:base="https://technicjelle.com/blog/2023/01/19/planes-tower-defence-002-pathfinding">
      <div xmlns="http://www.w3.org/1999/xhtml">
        <nav class="center">
          <p>
            <a href="/blog/2023/01/14/planes-tower-defence-001-level">← Previous Post</a>
            |
            <a href="/blog/2023/01/28/planes-tower-defence-003-the-rest">Next Post →</a>
          </p>
        </nav>
        <p>
          <img src="https://technicjelle.com/blog/2023/01/19/planes-tower-defence-002-pathfinding/path-links.png" alt="" />
        </p>
        <p>In the last post, I wrote about the creation of the level, so now in this one, I'll be writing about how I prepared for the "pathfinding" for the enemies.</p>
        <p>On each corner and split in the road, I placed an Empty game object. This is an object that has no information about anything, except for its own position, so they're a very nice base to work off of.</p>
        <p>I placed all the Empty route points in a group called "Route" and named them:</p>
        <p>
          <img src="https://technicjelle.com/blog/2023/01/19/planes-tower-defence-002-pathfinding/route-list.png" alt="" />
        </p>
        <p>Then I wrote a script for the Route, that draws a little sphere and a label for the name around each node, but only when I'm editing the level; when the game is exported, it doesn't do anything.</p>
        <pre>[ExecuteInEditMode] public class RouteNodeDrawer : MonoBehaviour { #if UNITY_EDITOR [SerializeField] private float nodeSize = 0.1f; [SerializeField] private int fontSize = 20; private IEnumerable&lt;Transform> _points; private IEnumerable&lt;Transform> GetRoutePoints() => GetComponentsInChildren&lt;Transform>().Where(t => t != transform); private void Awake() { _points = GetRoutePoints(); } private void Update() { if (EditorApplication.isPlaying) return; _points = GetRoutePoints(); } private void OnDrawGizmos() { if (_points == null) return; foreach (Transform point in _points) { if (point == null) continue; Gizmos.color = Color.red; Vector3 position = point.position; Gizmos.DrawSphere(position, nodeSize); Handles.Label(position, point.name, new GUIStyle{fontSize = fontSize}); } } #endif }</pre>
        <p>To have a nice base to pathfind on, we need what is called a Node Tree, which is simply a network of linked nodes. So I had to link each node to the next one. There aren't too many nodes here, so I could totally have done this by hand. That wouldn't be any fun, though, so I wrote another script that automatically links nodes together!</p>
        <pre>public class RouteNodeSetup : MonoBehaviour { private static bool IsAboutEqual(float a, float b) => Mathf.Abs(a - b) &lt; 0.01f; private void Awake() { RouteNode[] nodes = GetComponentsInChildren&lt;RouteNode>().ToArray(); foreach (RouteNode node in nodes) { if (node.nextNodes.Count != 0) continue; //don't overwrite manually set connections List&lt;RouteNode> rightNodes = new(); List&lt;RouteNode> bottomNodes = new(); foreach (RouteNode otherNode in nodes) { if (node == otherNode) continue; //don't connect to self //if otherPoint is to the right of this point if (IsAboutEqual(node.transform.position.y, otherNode.transform.position.y) &amp;&amp; otherNode.transform.position.x > node.transform.position.x) { rightNodes.Add(otherNode); } //if otherPoint is to the bottom of this point else if (IsAboutEqual(node.transform.position.x, otherNode.transform.position.x) &amp;&amp; node.transform.position.y > otherNode.transform.position.y) { bottomNodes.Add(otherNode); } } //sort by x position rightNodes.Sort((a, b) => a.transform.position.x.CompareTo(b.transform.position.x)); //sort by y position bottomNodes.Sort((a, b) => b.transform.position.y.CompareTo(a.transform.position.y)); if (rightNodes.Count > 0) node.nextNodes.Add(rightNodes[0]); if (bottomNodes.Count > 0) node.nextNodes.Add(bottomNodes[0]); } } }</pre>
        <p>This script loops through all the Empties, and makes them check all other Empties. If there's an Empty to the right or to the bottom of this, we link that one as being a possible next node in the tree.</p>
        <p>Due to the way I laid out this level, there are a couple nodes in this network that either have dead ends (10 and 13), or neighbours that shouldn't actually be connected (5 and 16). So those nodes, I set up manually, but the other ones all connect themselves automatically!</p>
        <p>The Route Nodes then draw little debug arrows, so we can easily see which nodes point to which other nodes.</p>
        <p>
          Node trees usually don't have directional links, like I have here (as you can see by the arrows). Instead of having directional links, they just throw all nodes into one big, fully interconnected tree, and use a proper pathfinding algorithm like A* ("a star") to calculate the best route to get from one point to another. A* is used in many, many games, due to its versatility and relatively accurate and speedy performance. I've programmed A* before, but I didn't feel like doing it again
          <span class="small">(because it's kind of annoying)</span>
          so I went for something simpler for this game.
        </p>
        <p>The enemies in this game don't plan a route beforehand, but instead chooses where to go on the fly: When an enemy arrives at a Route Node, it can see which other Route Nodes this current one connects to, and then just choose one of those as its next destination. As long as all the nodes are connected properly (which you can check by following the arrows), this is a fine enough method in this case.</p>
        <p>The reason this works here, is precisely because my nodes aren't fully interconnected, but have a direction to them. If they weren't directional, the possibility for enemies to get stuck walking in circles would arise (which you can, in fact, sometimes see happening around nodes 10 and 13, where there are arrows one way and the other over the same road)</p>
        <p>The way enemies choose their next destination is by looking how often each potential next destination has been visited, and it'll choose the one with the least amount. This means the enemies in this game all choose the least trodden path. I found this a quite elegant solution and in fact I prefer it over just randomly choosing a next destination, as this is surer to evenly distribute enemies over each different route.</p>
        <p>So this is the reason why I wrote pathfinding with quotes; it doesn't actually find a path it wants to go along at the start with a proper pathfinding algorithm, but it just chooses between some predefined path segments.</p>
        <p>The next post will talk more about the enemies themselves.</p>
        <p>
          <strong>
            Source code available
            <a href="https://github.com/TechnicJelle/PlanesTowerDefence">here</a>
          </strong>
        </p>
        <hr />
        <p>As a bonus, here's a video I recorded during this process, when the node linking didn't work all too well yet...</p>
        <p>
          <video src="https://technicjelle.com/blog/2023/01/19/planes-tower-defence-002-pathfinding/Peek 2022-12-23 11-09.mp4" controls="" loop="" muted="" playsinline=""></video>
        </p>
        <nav class="center">
          <p>
            <a href="/blog/2023/01/14/planes-tower-defence-001-level">← Previous Post</a>
            |
            <a href="/blog/2023/01/28/planes-tower-defence-003-the-rest">Next Post →</a>
          </p>
        </nav>
      </div>
    </content>
  </entry>
  <entry>
    <title>Planes Tower Defence - Level</title>
    <link href="https://technicjelle.com/blog/2023/01/14/planes-tower-defence-001-level" rel="alternate" />
    <id>urn:uuid:019dc1ff-801e-717d-befd-d6c76e0520df</id>
    <published>2023-01-14T00:00:00.000Z</published>
    <updated>2023-01-14T00:00:00.000Z</updated>
    <content type="xhtml" xml:lang="en" xml:base="https://technicjelle.com/blog/2023/01/14/planes-tower-defence-001-level">
      <div xmlns="http://www.w3.org/1999/xhtml">
        <nav class="center">
          <p>
            <a href="/blog/2023/01/19/planes-tower-defence-002-pathfinding">Next Post →</a>
          </p>
        </nav>
        <p>Over the last couple of weeks, I've been working on making a little tower defence game in Unity. Now that I've made quite some progress with the base of the game, I felt like it was time to write a bit about it, so let's go!</p>
        <p>In this post, I'll write about the creation of this level:</p>
        <p>
          <img src="https://technicjelle.com/blog/2023/01/14/planes-tower-defence-001-level/level.png" alt="level" />
        </p>
        <h2 id="tiles">
          Tiles
          <a href="#tiles" class="link">🔗</a>
        </h2>
        <p>
          I started off with finding a good tileset to use. For this game, I wanted to focus on the code and behaviours, instead of on the art. So I found
          <a href="https://kenney.nl/assets/pixel-shmup">this nice Kenney pack</a>
          :
        </p>
        <p>
          <img src="https://technicjelle.com/blog/2023/01/14/planes-tower-defence-001-level/kenney.png" alt="kenney shmup" />
        </p>
        <p>
          So then I got to work importing this into Unity, to make a nice level with these tiles. This is the first time I'm making a 2D game in Unity, so I had to look up how to make tile grids work and found
          <a href="https://www.youtube.com/watch?v=g83_gwEO0kM">this great tutorial</a>
          .
        </p>
        <p>I made good use of the auto-tiling feature that Unity provides, so I could just simply draw where I wanted the roads to be, and Unity would then choose exactly which tile of the tileset to put where, so the roads would look nice and connected.</p>
        <p>
          <img src="https://technicjelle.com/blog/2023/01/14/planes-tower-defence-001-level/tiling-rules.png" alt="tiling rules in unity" />
        </p>
        <h2 id="artifacting">
          Artifacting
          <a href="#artifacting" class="link">🔗</a>
        </h2>
        <p>During the process of working with this grid of tiles, I found a strange problem, though. Sometimes there would be small lines where they shouldn't be, as you can see here:</p>
        <p>
          <img src="https://technicjelle.com/blog/2023/01/14/planes-tower-defence-001-level/artifacts.png" alt="pixel artifacting" />
        </p>
        <p>There's just the tiniest line of darker pixels in the green grass. This had me, and my teacher, quite stumped for a while, until we finally figured out that it was due to the specific dimensions of the viewport! It wasn't an even amount of pixels wide by high, so at some rows and columns, the GPU chose wrong which pixels to sample from the tileset texture. So luckily this issue could be solved very easily by just never having a screen with an uneven numbered resolution, which never happens anyway! It just can happen inside the Unity editor.</p>
        <p>Next post will be about the "pathfinding" I did. (And you'll also understand then why I'm writing that with quotes ;) )</p>
        <p>
          <strong>
            Source code available
            <a href="https://github.com/TechnicJelle/PlanesTowerDefence">here</a>
          </strong>
        </p>
        <nav class="center">
          <p>
            <a href="/blog/2023/01/19/planes-tower-defence-002-pathfinding">Next Post →</a>
          </p>
        </nav>
      </div>
    </content>
  </entry>
  <entry>
    <title>Custom Android to Arduino Communication</title>
    <link href="https://technicjelle.com/blog/2022/10/11/custom-android-to-arduino-communication" rel="alternate" />
    <id>urn:uuid:019dc1ff-801e-7900-b5a7-e40f25e2a45a</id>
    <published>2022-10-11T00:00:00.000Z</published>
    <updated>2022-10-11T00:00:00.000Z</updated>
    <content type="xhtml" xml:lang="en" xml:base="https://technicjelle.com/blog/2022/10/11/custom-android-to-arduino-communication">
      <div xmlns="http://www.w3.org/1999/xhtml">
        <p>Today I spent the evening (~6 hours) writing a custom Android app to connect my Arduino to with a custom program for that one too, so I can read and graph the values from its joystick:</p>
        <p>
          <video src="https://technicjelle.com/blog/2022/10/11/custom-android-to-arduino-communication/VID_20221010_235628739.webm" autoplay="" controls="" loop="" muted="" playsinline=""></video>
        </p>
        <p>No PC required! Just power to the Arduino.</p>
        <p>It works over Wi-Fi with Web Sockets, with the phone being the server, and the Arduino being the client.</p>
        <p>The code of this project is quite horrible, so I'm not publishing it this time. Also because it's basically just two library examples mashed together plus one of my lecture code samples, so hardly any of this is actually my own code.</p>
      </div>
    </content>
  </entry>
  <entry>
    <title>Some GeoNodes art I made in October</title>
    <link href="https://technicjelle.com/blog/2022/10/10/october-geonodes" rel="alternate" />
    <id>urn:uuid:019dc1ff-801e-7748-8718-3f2e2a0b15ec</id>
    <published>2022-10-10T00:00:00.000Z</published>
    <updated>2022-10-10T00:00:00.000Z</updated>
    <content type="xhtml" xml:lang="en" xml:base="https://technicjelle.com/blog/2022/10/10/october-geonodes">
      <div xmlns="http://www.w3.org/1999/xhtml">
        <h2 id="whizzy-points-along-curve">
          Whizzy Points Along Curve
          <a href="#whizzy-points-along-curve" class="link">🔗</a>
        </h2>
        <p>
          <video src="https://technicjelle.com/blog/2022/10/10/october-geonodes/Whizzy0001-0300.mp4" autoplay="" loop="" muted="" playsinline=""></video>
        </p>
        <p>I made some particles that spin around in a fun way! :D</p>
        <p>The main node network:</p>
        <p>
          <img src="https://technicjelle.com/blog/2022/10/10/october-geonodes/Whizzy_Nodes.png" alt="" />
        </p>
        <p>There is currently no way to spawn points randomly inside a volume, so I made a custom way to do that.</p>
        <p>
          <img src="https://technicjelle.com/blog/2022/10/10/october-geonodes/Whizzy_Curve.png" alt="" />
        </p>
        <p>With the GeoNodes setup, you can easily add more points on the curve and change the radius of the curve.</p>
        <p>
          I posted this on ArtStation, too, so give me a like and a follow over there if you want:
          <a href="https://www.artstation.com/artwork/eJn9ew">https://www.artstation.com/artwork/eJn9ew</a>
        </p>
        <h2 id="cracks">
          Cracks
          <a href="#cracks" class="link">🔗</a>
        </h2>
        <p>Originally, this was a post solely about the Whizzy Points setup, but while porting the post to my new blog site, I found another two pieces I made in the same timeframe, so I thought I might as well share it here! :)</p>
        <p>
          <video src="https://technicjelle.com/blog/2022/10/10/october-geonodes/Cracks0001-0250.mp4" autoplay="" loop="" muted="" playsinline=""></video>
        </p>
        <p>
          <img src="https://technicjelle.com/blog/2022/10/10/october-geonodes/Cracks_Nodes.png" alt="" />
        </p>
        <h2 id="negative-text">
          Negative Text
          <a href="#negative-text" class="link">🔗</a>
        </h2>
        <p>This one was made before October, but 🤫</p>
        <p>
          <img src="https://technicjelle.com/blog/2022/10/10/october-geonodes/NegativeText.png" alt="" />
        </p>
      </div>
    </content>
  </entry>
  <entry>
    <title>Fireworks Display in C++ with the PixelGameEngine</title>
    <link href="https://technicjelle.com/blog/2022/09/01/pixelgameengine-fireworks-display" rel="alternate" />
    <id>urn:uuid:019dc1ff-801e-7eab-a7f5-003f24ea24f6</id>
    <published>2022-09-01T00:00:00.000Z</published>
    <updated>2022-09-01T00:00:00.000Z</updated>
    <content type="xhtml" xml:lang="en" xml:base="https://technicjelle.com/blog/2022/09/01/pixelgameengine-fireworks-display">
      <div xmlns="http://www.w3.org/1999/xhtml">
        <p>Over the last couple of days, I've made a simple, little fireworks display:</p>
        <p>
          <video src="https://technicjelle.com/blog/2022/09/01/pixelgameengine-fireworks-display/fireworks.mp4" autoplay="" loop="" muted="" playsinline=""></video>
        </p>
        <p>It was supposed to be a quick project, but the physics were a little different than I usually do, so it took a little longer.</p>
        <p>
          In the past, I've always made my simulations like these in
          <a href="https://processing.org/">Processing</a>
          , which is a very, very great tool for learning stuff like this.
        </p>
        <p>Though now I feel like I'm ready for something more advanced, so I'm starting to use the PixelGameEngine for stuff like this, which is a something similar to Processing, but you use C++, instead.</p>
        <p>C++ is a programming language just like Processing is, but it's a lot more difficult. The performance advantages of it, however, often outweigh the extra complexity.</p>
        <p>
          So switching to C++ allows me much greater
          <strong>performance</strong>
          and also much more
          <strong>control</strong>
          about what exactly happens everywhere.
        </p>
        <p>In Processing, the simulations typically run at a set frame rate, 60 fps by default.</p>
        <p>In the PixelGameEngine, the frame rate is unlocked, meaning that it'll go as fast as possible.</p>
        <p>Movement on computers usually goes by displacing a thing by a little bit every amount of time. When that amount of time is constant, like in Processing, this is easy: if we want to move a circle 60 pixels a second, we simply have to move it by 1 pixel per frame.</p>
        <p>In the PixelGameEngine this would not work, as the frame rate is not constant: sometimes it's 1000 fps, and at other times it is 3000 fps! (Told you the performance was better ;D )</p>
        <p>If we were to move the circle by one pixel every frame, the circle would sometimes move faster than at other times, which is not what we want.</p>
        <p>
          As such, a different way of movement has to be used, and luckily for us, the PixelGameEngine provides the perfect solution for this:
          <em>delta time</em>
          !
        </p>
        <p>Delta time is the amount of time that has passed since the last frame was displayed, and we can use this to multiply the speed of the circle with to make the speed constant!</p>
        <p>
          To move something in a way like one would move something in real life, we need a
          <em>physics system</em>
          . This is used, so we can apply forces to objects to move them, instead of just saying "the circle moves at 100 pixels per second".
        </p>
        <p>Writing a physics system that takes the delta time into account correctly was surprisingly more difficult than I had anticipated at the start of this project.</p>
        <p>
          I started by implementing a physics system like I was always used to from Processing, learnt from the book The nature of Code, while now trying to always account for the delta time in my calculations:
          <br />
          <em>(fElapsedTime is the delta time)</em>
        </p>
        <pre>void Particle::Update(float fElapsedTime) { velocity += acceleration; position += velocity * fElapsedTime; acceleration = { 0.0f, 0.0f };</pre>
        <p>But in the end, I had to give up on that and go for a different way of calculating the delta time into my code...</p>
        <p>
          I was helpfully given a link to
          <a href="https://code.tutsplus.com/how-to-create-a-custom-2d-physics-engine-the-core-engine--gamedev-7493t#timestepping">this blog</a>
          that explains a new (to me) way of handling cases like exactly these!
        </p>
        <pre>const float fps = 100 const float dt = 1 / fps float accumulator = 0 // In units of seconds float frameStart = GetCurrentTime( ) // main loop while(true) const float currentTime = GetCurrentTime( ) // Store the time elapsed since the last frame began accumulator += currentTime - frameStart( ) // Record the starting of this frame frameStart = currentTime while(accumulator > dt) UpdatePhysics( dt ) accumulator -= dt RenderGame( )</pre>
        <p>This method, simply put, keeps track of the delta time over a longer amount of time, and if a certain amount of time has passed, let's say a tenth of a second, a new physics calculation is done.</p>
        <p>This effectively decouples the rendering and the physics from each other, allowing the physics to run at its own pace, while letting the rendering go at its own breakneck speed.</p>
        <p>What that also gives me, is a way to choose how often I want to calculate the next physics step, resulting in a simple way to set how accurate I want the simulation to be!</p>
        <p>So I followed the tips from that blog post and implemented them into my simulation and after a bit of work, it all looks as great as it does now :)</p>
        <p>So that's it!</p>
        <p>
          <strong>
            You can find the source code for this project
            <a href="https://github.com/TechnicJelle/FireworksPGE">here</a>
          </strong>
        </p>
        <hr />
        <p>
          <img src="https://technicjelle.com/blog/2022/09/01/pixelgameengine-fireworks-display/always-bet-on-red.png" alt="" />
        </p>
      </div>
    </content>
  </entry>
  <entry>
    <title>Space Combat 3DX Updates</title>
    <link href="https://technicjelle.com/blog/2022/07/13/space-combat-3dx-003-second-level-and-sounds" rel="alternate" />
    <id>urn:uuid:019dc1ff-801e-74dc-9432-d4595cbff6c3</id>
    <published>2022-07-13T00:00:00.000Z</published>
    <updated>2022-07-13T00:00:00.000Z</updated>
    <content type="xhtml" xml:lang="en" xml:base="https://technicjelle.com/blog/2022/07/13/space-combat-3dx-003-second-level-and-sounds">
      <div xmlns="http://www.w3.org/1999/xhtml">
        <nav class="center">
          <p>
            <a href="/blog/2022/07/10/space-combat-3dx-002-enemies">← Previous Post</a>
          </p>
        </nav>
        <iframe src="https://www.youtube-nocookie.com/embed/aCmfekB2mho" title="YouTube video player" style="border: 0;" allow="fullscreen; autoplay; clipboard-write; encrypted-media; picture-in-picture; web-share" referrerpolicy="strict-origin-when-cross-origin" sandbox="allow-scripts allow-same-origin"></iframe>
        <p>Since the last post, I've been hard at work adding more and more features! Mainly the second level and sounds, but there's a lot more that went into it all!</p>
        <h2 id="enemy-health">
          Enemy health
          <a href="#enemy-health" class="link">🔗</a>
        </h2>
        <p>Enemies now have health and can be defeated by bumping into them. I'll add an actual shooting mechanic to both the player and the enemies later. For now, this slightly more crude solution will have to do. The enemies also now have thruster particles of their own, just like the player.</p>
        <h2 id="skybox">
          Skybox
          <a href="#skybox" class="link">🔗</a>
        </h2>
        <p>I have added a second level with another completely custom skybox made in Blender! Those top two voronoi textures with the very wide colour ramps together are actually the first level's skybox. It just generates a ton of tiny white dots. There are two layers, because one makes tiny dots and the other makes even more and smaller dots.</p>
        <p>The bottom part is two layers of noise, distorting the UV space to generate a warped line going around the skybox. That line is then coloured in by the last colour ramp.</p>
        <p>
          <img src="https://technicjelle.com/blog/2022/07/13/space-combat-3dx-003-second-level-and-sounds/blender-space-nodes.png" alt="" />
        </p>
        <p>
          This cube map has been rendered out using the excellent
          <a href="https://blendswap.com/blend/17087">Cube Map Creation Toolkit</a>
          .
        </p>
        <h2 id="portals">
          Portals
          <a href="#portals" class="link">🔗</a>
        </h2>
        <p>You can go from one level to the other by travelling through a portal that appears once you've defeated all the enemies!</p>
        <p>
          <img src="https://technicjelle.com/blog/2022/07/13/space-combat-3dx-003-second-level-and-sounds/Screenshot_(8).png" alt="" />
        </p>
        <h2 id="sound">
          Sound
          <a href="#sound" class="link">🔗</a>
        </h2>
        <p>I also added sounds to the player's engine and also the enemies make buzzing sounds.</p>
        <p>And the game has some nice background music to fill up the empty space!</p>
        <p>
          Credits are listed in the repository's
          <a href="https://github.com/TechnicJelle/SpaceCombat3DX/tree/main#assets-used">README</a>
          .
        </p>
        <h2 id="menu">
          Menu
          <a href="#menu" class="link">🔗</a>
        </h2>
        <p>There's now a pause menu with volume sliders for three different categories of sounds! There is now also a quit button there. That is useful, because before there was no other way to stop the game than to press Alt+F4!</p>
        <p>
          <img src="https://technicjelle.com/blog/2022/07/13/space-combat-3dx-003-second-level-and-sounds/Screenshot_(9).png" alt="" />
        </p>
        <h2 id="tutorial">
          Tutorial
          <a href="#tutorial" class="link">🔗</a>
        </h2>
        <p>There's now also a bit of a tutorial in the top left that explains what to do:</p>
        <div class="img-list">
          <p>
            <img src="https://technicjelle.com/blog/2022/07/13/space-combat-3dx-003-second-level-and-sounds/tut1_rotate.png" alt="" />
            <img src="https://technicjelle.com/blog/2022/07/13/space-combat-3dx-003-second-level-and-sounds/tut2_thrust.png" alt="" />
            <img src="https://technicjelle.com/blog/2022/07/13/space-combat-3dx-003-second-level-and-sounds/tut3_goal.png" alt="" />
            <img src="https://technicjelle.com/blog/2022/07/13/space-combat-3dx-003-second-level-and-sounds/tut4_result.png" alt="" />
          </p>
        </div>
        <p>This tutorial system will be improved later.</p>
        <hr />
        <p>I'll be putting this project on hold for a little bit while I work on other projects. Perhaps I'll write about those too! :D</p>
        <p>
          <strong>
            Download the game
            <a href="https://github.com/TechnicJelle/SpaceCombat3DX#readme">here</a>
            !
          </strong>
        </p>
        <nav class="center">
          <p>
            <a href="/blog/2022/07/10/space-combat-3dx-002-enemies">← Previous Post</a>
          </p>
        </nav>
      </div>
    </content>
  </entry>
  <entry>
    <title>Enemy AI in my Space Shooter Game</title>
    <link href="https://technicjelle.com/blog/2022/07/10/space-combat-3dx-002-enemies" rel="alternate" />
    <id>urn:uuid:019dc1ff-801e-7d68-bf34-8f48cb7679a6</id>
    <published>2022-07-10T00:00:00.000Z</published>
    <updated>2022-07-10T00:00:00.000Z</updated>
    <content type="xhtml" xml:lang="en" xml:base="https://technicjelle.com/blog/2022/07/10/space-combat-3dx-002-enemies">
      <div xmlns="http://www.w3.org/1999/xhtml">
        <nav class="center">
          <p>
            <a href="/blog/2022/06/30/space-compat-3dx-001-spaceflight">← Previous Post</a>
            |
            <a href="/blog/2022/07/13/space-combat-3dx-003-second-level-and-sounds">Next Post →</a>
          </p>
        </nav>
        <iframe src="https://www.youtube-nocookie.com/embed/61txGXSI4q8" title="YouTube video player" style="border: 0;" allow="fullscreen; autoplay; clipboard-write; encrypted-media; picture-in-picture; web-share" referrerpolicy="strict-origin-when-cross-origin" sandbox="allow-scripts allow-same-origin"></iframe>
        <p>Today, I felt motivated to make the movement AI for the enemies in my in-development Space Shooter game in Unity.</p>
        <p>The last few days, I had already been thinking about how to best approach this, and ultimately I had thought up a system that would use a cone of raycasts as the "eyes" of the enemies. Those would detect the asteroids in front of them and by comparing the results from all the raycasts, it would choose the best direction for it to go.</p>
        <p>(Raycasts are basically a ray that you can shoot from one point to another point. That ray can collide with something on its way, and then it can give back information about the position of the hit, the thing it hit etc.)</p>
        <p>At first, I just had the enemy (at that point still just a capsule) simply gradually turn towards the player and accelerate forwards</p>
        <p>
          <video src="https://technicjelle.com/blog/2022/07/10/space-combat-3dx-002-enemies/Video1.mp4" autoplay="" controls="" loop="" muted="" playsinline=""></video>
        </p>
        <p>Just simply this was already surprisingly effective at annoying the player, but my goal was something more than this. For one thing, this could very easily get stuck behind asteroids.</p>
        <p>So I started working on the raycast system! The enemy would shoot out a ray directly in front of where it's going and checks if it detected a game object that can't be bumped around, like an asteroid. (The Unity RigidBody property "kinematic".) So, if the enemy detected an asteroid in front of it, it would shoot out a cone of rays.</p>
        <p>
          <img src="https://technicjelle.com/blog/2022/07/10/space-combat-3dx-002-enemies/Image1.png" alt="" />
        </p>
        <p>
          <img src="https://technicjelle.com/blog/2022/07/10/space-combat-3dx-002-enemies/Image2.png" alt="" />
        </p>
        <p>You can see those rays being shot out from the capsule in these images. It's really scanning that asteroid!</p>
        <p>The problem with the system I have displayed here is that I hadn't actually thought out how exactly I wanted to make the AI choose which way to go. I had thus far only thought about the raycasting, but not the actual "thought" behind the choosing of the new direction.</p>
        <p>I tried a few different systems, but ultimately had to switch gears a bit, because this system still shot out one ray usually and if it hit an asteroid, it would shoot out more. This system proved to not be effective enough, so I had to make it so that it always shot out the whole cone.</p>
        <p>
          <video src="https://technicjelle.com/blog/2022/07/10/space-combat-3dx-002-enemies/Video2.mp4" autoplay="" controls="" loop="" muted="" playsinline=""></video>
        </p>
        <p>As you can see here in this video, the rays all seem to get shot out fine. Except they don't. Which gets more apparent if the amount of rays it shoots out gets turned up:</p>
        <p>
          <video src="https://technicjelle.com/blog/2022/07/10/space-combat-3dx-002-enemies/Video3.mp4" autoplay="" controls="" loop="" muted="" playsinline=""></video>
        </p>
        <p>This had to do with the way I calculated the direction in which to shoot the rays, which at first was this:</p>
        <pre>for (int x = -rays; x &lt;= rays; x++) { for (int y = -rays; y &lt;= rays; y++) { Vector3 rayDir = Quaternion.Euler(x * angleBetweenRays, y * angleBetweenRays, 0) * dir; Debug.DrawRay(_position, rayDir * rayLength, Color.red); } }</pre>
        <p>And it turned out it had to be this, instead:</p>
        <pre>for (int x = -rays; x &lt;= rays; x++) { for (int y = -rays; y &lt;= rays; y++) { Vector3 rayDir = Quaternion.AngleAxis(x * angleBetweenRays, _transformCached.TransformDirection(Vector3.up)) * Quaternion.AngleAxis(y * angleBetweenRays, _transformCached.TransformDirection(Vector3.right)) * dir; Debug.DrawRay(_position, rayDir * rayLength, Color.red); } }</pre>
        <p>I'm not too familiar with how quaternions work exactly yet, but I think it had to do with the rays not taking the rotation on the enemy transform into account correctly. By explicitly doing TransformDirection for each axis, that solved it.</p>
        <p>In this video, you can see it finally working correctly!</p>
        <p>
          <video src="https://technicjelle.com/blog/2022/07/10/space-combat-3dx-002-enemies/Video4.mp4" autoplay="" controls="" loop="" muted="" playsinline=""></video>
        </p>
        <p>So with this better system for continuous raycasting, I could continue working on the actual choice of direction!</p>
        <p>I tried quite another few different comparison methods, but this is what I ended up going with: The enemy shoots out all the rays first, and if it hits anything, it chooses the direction of the ray that's the furthest point from anything it hit. As such, it can pretty nicely avoid asteroids!</p>
        <p>
          You can see the final result in the YouTube video all the way at the
          <a href="#enemy-ai-in-my-space-shooter-game">top</a>
          of this post!
        </p>
        <p>
          <strong>
            You can download this version of the game
            <a href="https://github.com/TechnicJelle/SpaceCombat3DX/releases/tag/v0.0.2">here</a>
          </strong>
          <br />
          <em>(builds available for both Windows and Linux)</em>
        </p>
        <p>
          And you can see the source code of this version
          <a href="https://github.com/TechnicJelle/SpaceCombat3DX/tree/v0.0.2">here</a>
          .
        </p>
        <hr />
        <p>By the way, this is what happens if you turn up the amount of rays and the distance between them too much:</p>
        <p>
          <img src="https://technicjelle.com/blog/2022/07/10/space-combat-3dx-002-enemies/Image3.png" alt="" />
        </p>
        <nav class="center">
          <p>
            <a href="/blog/2022/06/30/space-compat-3dx-001-spaceflight">← Previous Post</a>
            |
            <a href="/blog/2022/07/13/space-combat-3dx-003-second-level-and-sounds">Next Post →</a>
          </p>
        </nav>
      </div>
    </content>
  </entry>
  <entry>
    <title>Pacman</title>
    <link href="https://technicjelle.com/blog/2022/07/01/pacman" rel="alternate" />
    <id>urn:uuid:019dc1ff-801c-7c3c-a452-ac0b4c785f97</id>
    <published>2022-07-01T00:00:00.000Z</published>
    <updated>2022-07-01T00:00:00.000Z</updated>
    <content type="xhtml" xml:lang="en" xml:base="https://technicjelle.com/blog/2022/07/01/pacman">
      <div xmlns="http://www.w3.org/1999/xhtml">
        <p>I made a Pacman!</p>
        <p>
          Blender YouTuber Default Cube uploaded
          <a href="https://www.youtube.com/watch?v=AM_HYYY6VII">a video tutorial</a>
          on how to make a Pacman with Blender Geometry Nodes.
        </p>
        <p>Before watching how he did it, I tried my own hand at doing it and this is the result!</p>
        <p>It took me two attempts and about two hours of fiddling until I got it looking nice, but I am very happy with the outcome :)</p>
        <p>
          <video src="https://technicjelle.com/blog/2022/07/01/pacman/pacman_0001-0060.mp4" autoplay="" loop="" muted="" playsinline=""></video>
        </p>
        <p>Here is the final node-tree:</p>
        <p>
          <img src="https://technicjelle.com/blog/2022/07/01/pacman/pacman_nodes.png" alt="A screenshot of Blender 3.2.0, showing a node-tree at the bottom, and the pacman at the top" />
        </p>
        <p>
          I posted it on ArtStation, too, so give me a like and a follow over there if you want:
          <a href="https://www.artstation.com/artwork/KO9Y1o">https://www.artstation.com/artwork/KO9Y1o</a>
        </p>
      </div>
    </content>
  </entry>
  <entry>
    <title>Spaceflight in my Space Shooter Game</title>
    <link href="https://technicjelle.com/blog/2022/06/30/space-compat-3dx-001-spaceflight" rel="alternate" />
    <id>urn:uuid:019de611-44c9-7c94-8b03-7cb50baf4db7</id>
    <published>2022-06-30T00:00:00.000Z</published>
    <updated>2022-06-30T00:00:00.000Z</updated>
    <content type="xhtml" xml:lang="en" xml:base="https://technicjelle.com/blog/2022/06/30/space-compat-3dx-001-spaceflight">
      <div xmlns="http://www.w3.org/1999/xhtml">
        <nav class="center">
          <p>
            <a href="/blog/2022/07/10/space-combat-3dx-002-enemies">Next Post →</a>
          </p>
        </nav>
        <p>
          <em>(This post was written years later, because I found some more early footage)</em>
        </p>
        <iframe src="https://www.youtube-nocookie.com/embed/cKj2shehFGs" title="YouTube video player" style="border: 0;" allow="fullscreen; autoplay; clipboard-write; encrypted-media; picture-in-picture; web-share" referrerpolicy="strict-origin-when-cross-origin" sandbox="allow-scripts allow-same-origin"></iframe>
        <p>
          The space environment has been created with Blender, and rendered out using the excellent
          <a href="https://blendswap.com/blend/17087">Cube Map Creation Toolkit</a>
          .
        </p>
        <p>
          <strong>
            You can download this version of the game
            <a href="https://github.com/TechnicJelle/SpaceCombat3DX/releases/tag/v0.0.1">here</a>
          </strong>
          <br />
          <em>(builds available for both Windows and Linux)</em>
        </p>
        <p>
          And you can see the source code of this version
          <a href="https://github.com/TechnicJelle/SpaceCombat3DX/tree/v0.0.1">here</a>
        </p>
        <nav class="center">
          <p>
            <a href="/blog/2022/07/10/space-combat-3dx-002-enemies">Next Post →</a>
          </p>
        </nav>
      </div>
    </content>
  </entry>
</feed>